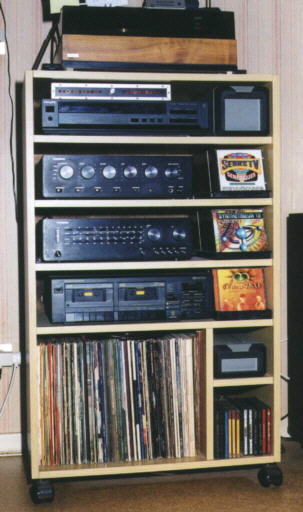
A Hi-Fi piece of furniture on casters
Material :
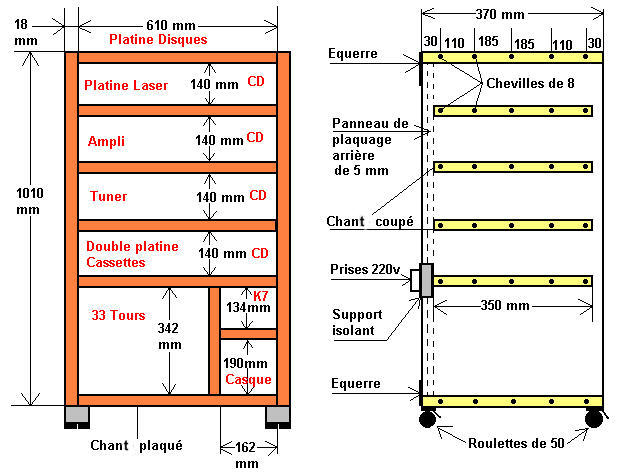
2 wooden panels : 1010 x 370 x 18 mm.
2 wooden panels : 610 x 370 x 18 mm.
4 wooden panels : 610 x 350 x 18 mm.
1 wooden panel : 974 x 610 x 5 mm.
4 casters with 4 holes for 50 kg. (minimum)
4 flat squares with 5 holes.
28 screws for wood : 4 x 20 mm.
8 screws for wood : 4 x 15 mm.
4 screws for wood : 4 x 35 mm.
70 wooden dowels : 8 x 40 mm .
1 isolating support : 440 x 60 x 10 mm.
5 sockets : 2 P - 250 v - 6 amp.
5 meters of white electric cable : 2 x 1,5 mm².
1 white plug : 2 P - 250 v - 6 amp.
1 cylinder saw.
1 adjustable dowels assembly guide.
1 tube of woodworking glue.
One 8 mm drill to make holes with flat bottom.
Advice :
First of all, look for pressed wood chips boards (clearoak for example) in shop which are specialized in do-it-yourself things and take their measures.
Then, draw a diagram to know in which direction you're going to cut out your shelves. The corners will be reserved for the lateral panels and the cut parts will be behind and towards the bottom. (That's why the bottom shelf is not carrying anything)
You'll cut with a jigsaw and a rule which is maintained with screw clamps : the whole thing resting on trestles. (ask someone to give you a hand, it will be easier)
Once you've sawn all your panels, locate all your drillings with a pencil. Read well the instructions for the drilling and the assembly with dowels. (TRIPLEX-794B)
The flat bottomed drill, can be made by grinding the end of an auger.
If you use 18 mm plywood, be careful : the holes which are made in the lateral panels, musn't exceed 15 mm. Which give you a 25 mm depth to drill your shelves.
Now you can pour the glue in the holes and plunge into them wooden pins which must be all the same length.
The 2 racks to tidy the audio tapes and the headphones are optional but quite useful : they are made with off cuts (no need to waste !) and they will assembled at first.
Normally, the assembly is done in 2 times : you need one day for the 60 wooden pins to rest and the glue to dry.
The following day, for example, lay the 2 big panels, pour a few glue drops in the holes and fix all your shelves in the first panel (be careful the good direction), only with your hands. (be careful, the bottom and top one are bigger)
Put the whole thing on the second panel and fix the shelves. (if needed hit if with your fists)
Only now, you can achieve the assembly by hitting with a hammer. Don't forget to insert a wedge in order not to damage your piece of furniture. (wipe the surplus of glue)
It will not remain you any more than to attach the squares behind to make rigid the unit, to set the bottom with its holes done with a cylinder saw. The holes are useful to pass cables. For the casters, 2 out of 4 screws mustn't exceed 15 mm.
Once you have fixed 5 sockets on the isolating support, they will be parallel connected, and the support will be screwed on the next to the last shelf.
Do not forget to make before-holes (2 mm) each time you screw screws for wood : it will prevent the wood from being damaged.
Once all the parts of your stereo system are set up, your Hi-Fi piece of furniture will only need one socket in your living room.
Good luck !
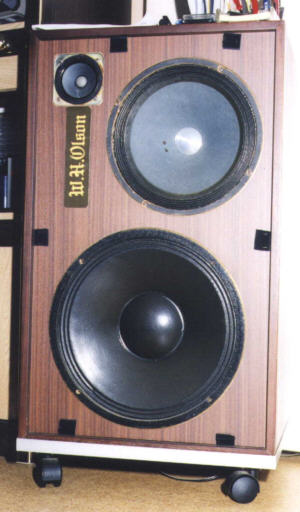
And as long as you are there, make the piece of furniture below for your loud speakers. (it is the cleaning lady who will be happy !)